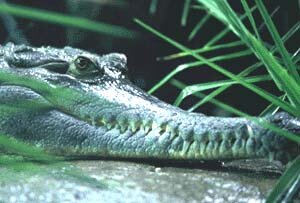
 We've all seen those great photos taken on safari -- the charging rhino, the soulful eyes of a orangutan staring into the camera, the huge teeth of a yawning tiger, the baby elephant and its mother. Taken in the wild? Sure.But did you know that those great animal shots can be taken right around the corner at your local zoo or wildlife conservation park.
There's a lot of good reasons to photograph at the zoo. The animals make better subjects because they may be in better condition and therefore more photogenic than in the wild. You don't have to spend days pounding the bush just to catch a glimpse of the animal you are tracking. You can arrange to go on your backyard safari on a day when the weather is perfect. You don't need to be concerned about your subject matter looking upon you as a food source. And, most of all, you can get close to the animal and wait for the perfect shot.
With fast film (ISO 400 or higher) and a telephoto lens (even the "zoomed in" setting on your 35-115mm point-and-shoot camera) you can get those award-winning photos in the "wild." Here's some specific shooting tips from the New York Institute of Photography (NYI), the world's largest photography school.
- Go early when the weather is cool and the crowds are not there yet. You will find the animals to be more active early in the morning.
- Get in tight so that the animal's face fills the frame of your picture as much as possible. Then, with a little patience, wait for an expression. A photo of an alligator showing his big teeth makes a much more interesting picture than if his mouth were closed.
- Try using a flash to create catch lights in the eyes of your subjects. A flash also comes in handy when you are shooting animals on display behind glass. Just remember to shoot at an angle through the glass rather than head on to avoid glare from the flash.
- If you are shooting with an SLR, use a wide open shutter speed of f/2.8 or larger if possible. By using selective focus, you will be able to eliminated distracting elements in the foreground and background like fake rocks or bars.
- Finally, remember NYI's Three Guidelines for Better Photographs:
- Guideline One is to know what you want to be the subject of your picture before you look through the viewfinder.
- Guideline Two is to focus attention on your subject. You can do this by filling the frame with the animal.
- Guideline Three is to simplify the photo by eliminating distracting elements like cages.